AdGuard Home – Encryption
We are proud to say that AdGuard Home supports all modern DNS encryption protocols out-of-the-box:
AdGuard Home also supports DNSCrypt (both client-side and server-side). Read this to learn about configuring AdGuard Home as a DNSCrypt server.
In this guide we will explain how to setup your own "Secure DNS" server with AdGuard Home.
- Install AdGuard Home on your server
- Register a domain name
- Get an SSL certificate
- Configure AdGuard Home
- Using with reverse proxy
- Configure your devices
Install AdGuard Home on your server
It does not make much sense to configure DNS encryption inside of your own local network. The purpose of securing your DNS traffic is to secure it from third-parties that might be analyzing or modifying it. For instance, from your ISP.
It means that you will need a server with a public dedicated IP address. There are plenty of cheap cloud servers providers: DigitalOcean, Vultr, Linode, etc. Just choose one, create a cloud server there, and install AdGuard Home on your server.
Register a domain name
First of all, you need a domain name. If you have never registered one, here is a simple instruction that will help you with that.
Get an SSL certificate
Both DNS-over-HTTPS and DNS-over-TLS are based on TLS
encryption so in order to use them, you will need to acquire an
SSL certificate.
An SSL certificate can be bought from a "Certificate Authority" (CA), a company trusted by browsers and operating systems to enroll SSL certificates for domains.
Alternatively, you can get the certificate for free from "Let's Encrypt" CA, a free certificate authority developed by the Internet Security Research Group (ISRG).
In this guide I'll explain how to get a certificate from them.
Using CertBot
Certbot is an easy-to-use client that fetches a certificate from Let’s Encrypt.
- Go to certbot.eff.org and choose "None of the above" software and your operating system.
- Follow the installation instructions, and stop there – don't get to the "Get Started" section.
Get a certificate using DNS challenge
You have just got a domain name so I suppose using DNS challenge will be the easiest way to get a certificate.
Run this command and follow the certbot's instructions:
sudo certbot certonly --manual --preferred-challenges=dns --preferred-chain="ISRG Root X1"
In the end you'll get two files:
-
fullchain.pem– your PEM-encoded SSL certificate. -
privkey.pem– your PEM-encoded private key.
Both will be necessary to configure AdGuard Home.
You will need to use the very same procedure to renew the existing certificate.
Using Lego
There's also a really nice and easy-to-use alternative to CertBot called lego.
- Install it using an appropriate method.
- Choose your DNS provider from the list and follow the instruction to obtain a certificate.
Also, here's a simple script that you can use to automate certificates generation and renewal.
Configure AdGuard Home
- Open AdGuard Home web interface and go to settings.
- Scroll down to the "Encryption" settings.
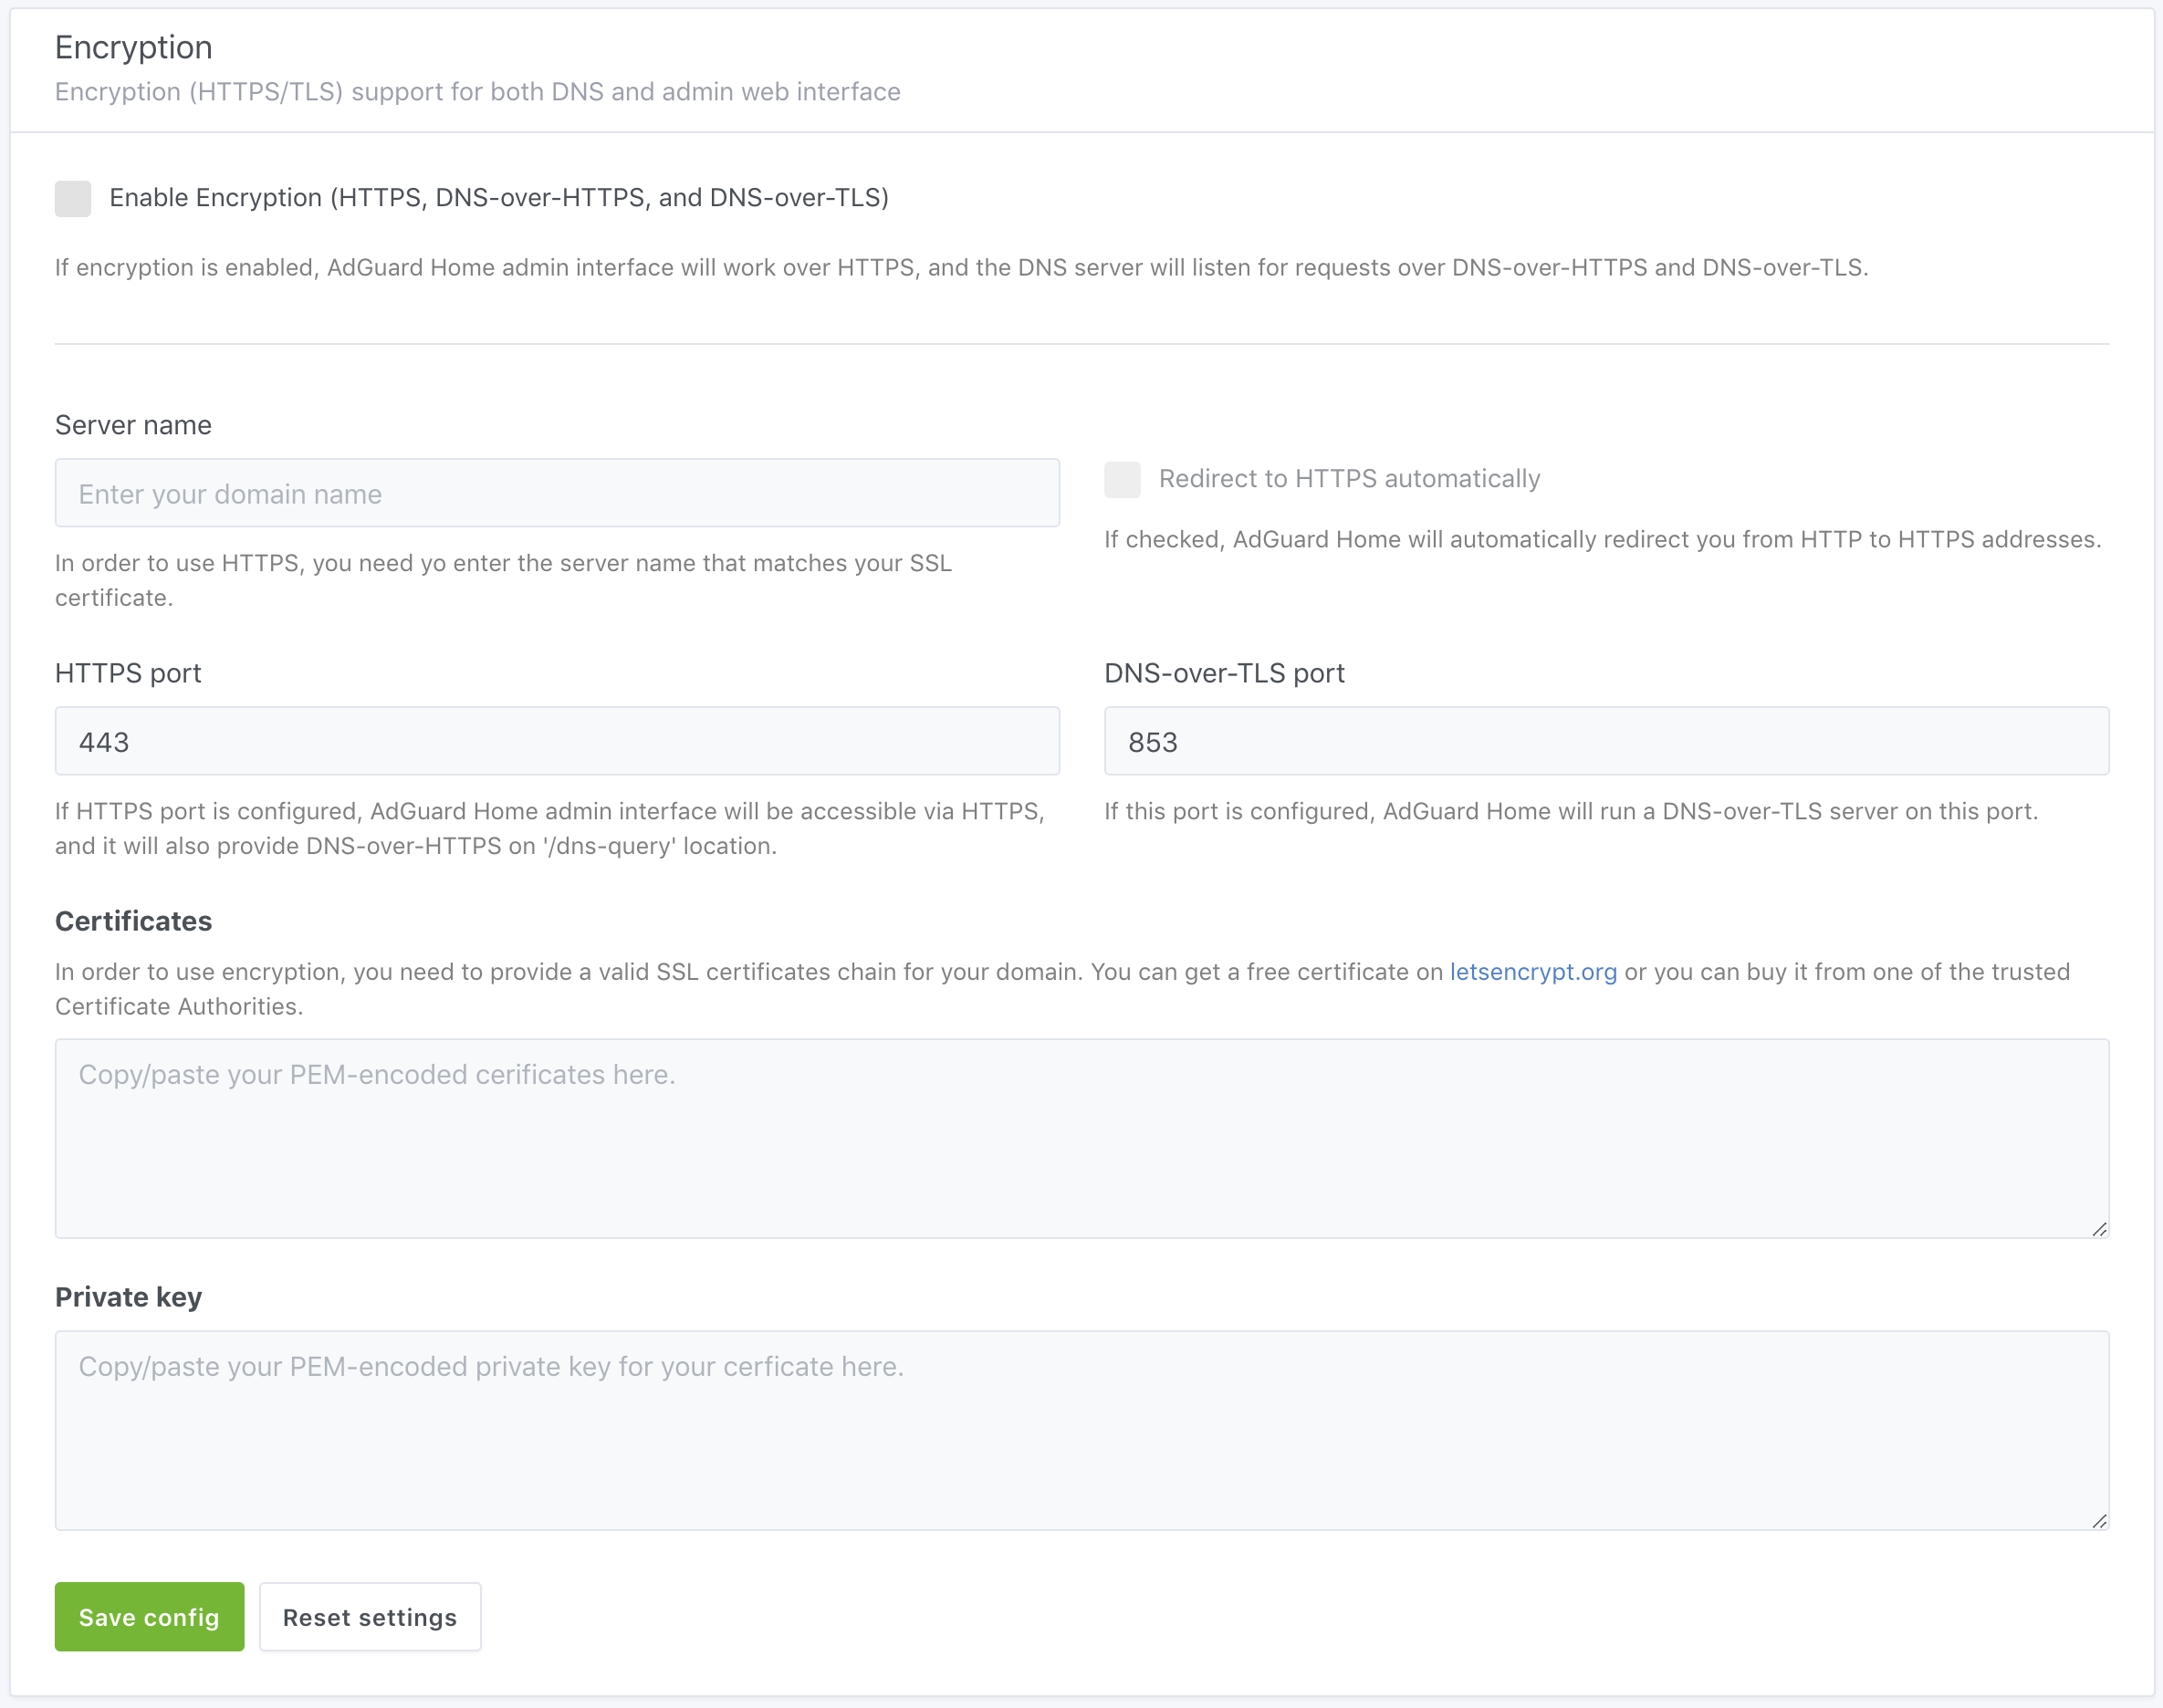
- Copy/paste the contents of the
fullchain.pemfile to "Certificates". - Copy/paste the contents of the
privkey.pemfile to "Private key". - Enter your domain name to "Server name".
- Click "Save settings".
Using with reverse proxy
We already have a guide on configuring a reverse proxy server for accessing AdGuard Home web UI.
Since v0.107.0 AdGuard Home is able to restrict DNS-over-HTTPS requests which came from the proxy server not included into "trusted" list. By default, it's configured to accept requests from IPv4 and IPv6 loopback addresses.
To enable AdGuard Home to handle DNS-over-HTTPS requests from a reverse proxy
server, set the trusted_proxies setting in AdGuardHome.yaml to the IP
address of the proxy server. If you have several proxy servers, you can use a
CIDR instead of a simple IP address.
Nginx reverse proxy
To configure AdGuard Home for accepting requests from Nginx reverse proxy server, make sure that the reverse proxy server itself is configured correctly.
The nginx.conf file should contain the appropriate directives to add the
supported forwarding headers to the request which are X-Real-IP or
X-Forwarded-For. This may be achieved with ngx_http_realip_module which is
explained here. In short, the module takes real IP
address of the client and writes it to the HTTP request's header. The AdGuard
Home will receive and interpret the value of this header as real client's
address. The address of the reverse proxy server will be received too and also
checked against the "trusted" proxies list.
Another header you might want to proxy is the Host header, which is required
to make AdGuard Home recognize requests from clients that have a ClientID in
their hostnames.
For example, if the configuration of the reverse proxy server contains the following directives:
location /dns-query {
   # …
   proxy_set_header Host $host;
   proxy_set_header X-Real-IP '1.2.3.4';
   proxy_bind 192.168.1.2;
   # …
}
AdGuard Home will get the 192.168.1.2 as the address of your proxy server and
check it against the trusted_proxies. The 1.2.3.4 will be controlled by
access settings in case the proxy is "trusted".
Cloudflare CDN
The Cloudflare's content delivery network acts as the reverse proxy appending
its own headers to the forwarded requests, which are
CF-Connecting-IP and True-Client-IP. These are also supported by AdGuard
Home so the reverse proxy servers' addresses may be
inserted into trusted_proxies list directly. An official Cloudflare's
reference on restoring the original visitor's IP may be found
here.
Other Headers
Other HTTP headers may be supported by AdGuard Home in the future. However, any headers-related feature requests should first be tried to be resolved by configuring the reverse proxy itself.
For example, to modify the HTTP Strict Transport Security mechanism to
include the experimental preload directive, something like the following piece
of configuration might be used:
location /dns-query {
   # …
   add_header Strict-Transport-Security "max-age=31536000; includeSubDomains; preload" always;
   # …
}
Configure your devices
Android
-
Android 9 supports
DNS-over-TLSnatively. To configure it, go to Settings → Network & internet → Advanced → Private DNS and enter your domain name there. -
AdGuard for Android supports
DNS-over-HTTPS,DNS-over-TLS,DNSCryptandDNS-over-QUIC. -
Intra adds
DNS-over-HTTPSsupport to Android.
iOS
-
iOS 14 and higher support
DNS-over-TLSandDNS-over-HTTPSnatively via configuration profiles. In order to make things easier, AdGuard Home can generate these configuration profiles for you. Just head to "Setup Guide" → "DNS Privacy" and scroll to iOS. -
AdGuard for iOS supports
DNS-over-HTTPS,DNS-over-TLS,DNSCryptandDNS-over-QUIC. -
DNSCloak supports
DNS-over-HTTPSbut in order to configure it to use your own server, you'll need to generate a DNS Stamp for it.
Windows
-
Windows 10 Build 19628 and higher support
DNS-over-HTTPSnatively. -
AdGuard for Windows supports
DNS-over-HTTPS,DNS-over-TLS,DNSCryptandDNS-over-QUIC.
MacOS
- MacOS Big Sur and higher support
DNS-over-TLSandDNS-over-HTTPSnatively via configuration profiles. In order to make things easier, AdGuard Home can generate these configuration profiles for you. Just head to "Setup Guide" → "DNS Privacy" and scroll to iOS.
Other implementations
-
AdGuard Home itself can be a secure DNS client on any platform.
-
dnsproxy supports all known secure DNS protocols.
-
dnscrypt-proxy supports
DNS-over-HTTPS. -
Mozilla Firefox supports
DNS-over-HTTPS.