If you don't have a USB-to-TTL serial adapter available, but you have a Raspberry Pi, you can use this procedure for flashing your device.
Tutorial (a little outdated)
Summarizing the process and needed connections based on the above blog, please refer there for a more detailed explanation 😉
Preparation of the Raspberry Pi
-
Install esptool (pip needed)
sudo pip install esptool -
Prepare serial connection.
Note: Use the correct serial connection as per your version of the Raspberry Pi.Device Serial Connection RaspberryPi 1/2/3 (BT disabled or miniuart) /dev/ttyAMA0 RaspberryPi 3 /dev/ttyS0 sudo systemctl stop serial-getty@ttyS0.servicesudo systemctl disable serial-getty@ttyS0.servicesudo cp /boot/cmdline.txt /boot/cmdline.bak(This backups the file ;))sudo nano /boot/cmdline.txt-> delete "console=serial0,115200" option -
I don’t know if this is necessary, but I did it as it was mentioned here:
https://spellfoundry.com/2016/05/29/configuring-gpio-serial-port-raspbian-jessie-including-pi-3/sudo nano /boot/config.txt-> add the line (at the bottom):
enable_uart=1Please note following overlays setting port to
/dev/ttyAMA0pi3-miniuart-btpi3-disable-bt
-
Reboot your Pi
Connections
Connect GND, RX->TX and TX->RX as shown below.
If you power the device with the 3.3V power from the RPi it will cause it to reboot when connecting. You can still enter flash mode if you power up the RPi with the 3.3v connected and pressing the connecting GPIO0 to ground (e.g., pressing the button on the Sonoff Basic) simultaneously. It's recommended to use either an external power supply for this or use the 5V GPIO and a 3.3V Voltage Regulator.
(issue #4807)
Do not connect 3.3V yet!
https://www.sigmdel.ca/michel/ha/sonoff/flashing_sonoff_en.html
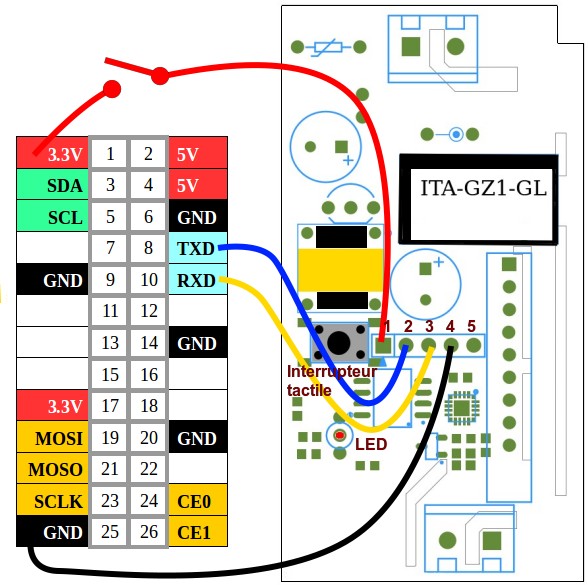
(For RaspberryPi 3 (40 GPIO pins) GND is the last pin on the left, the 39th pin.)
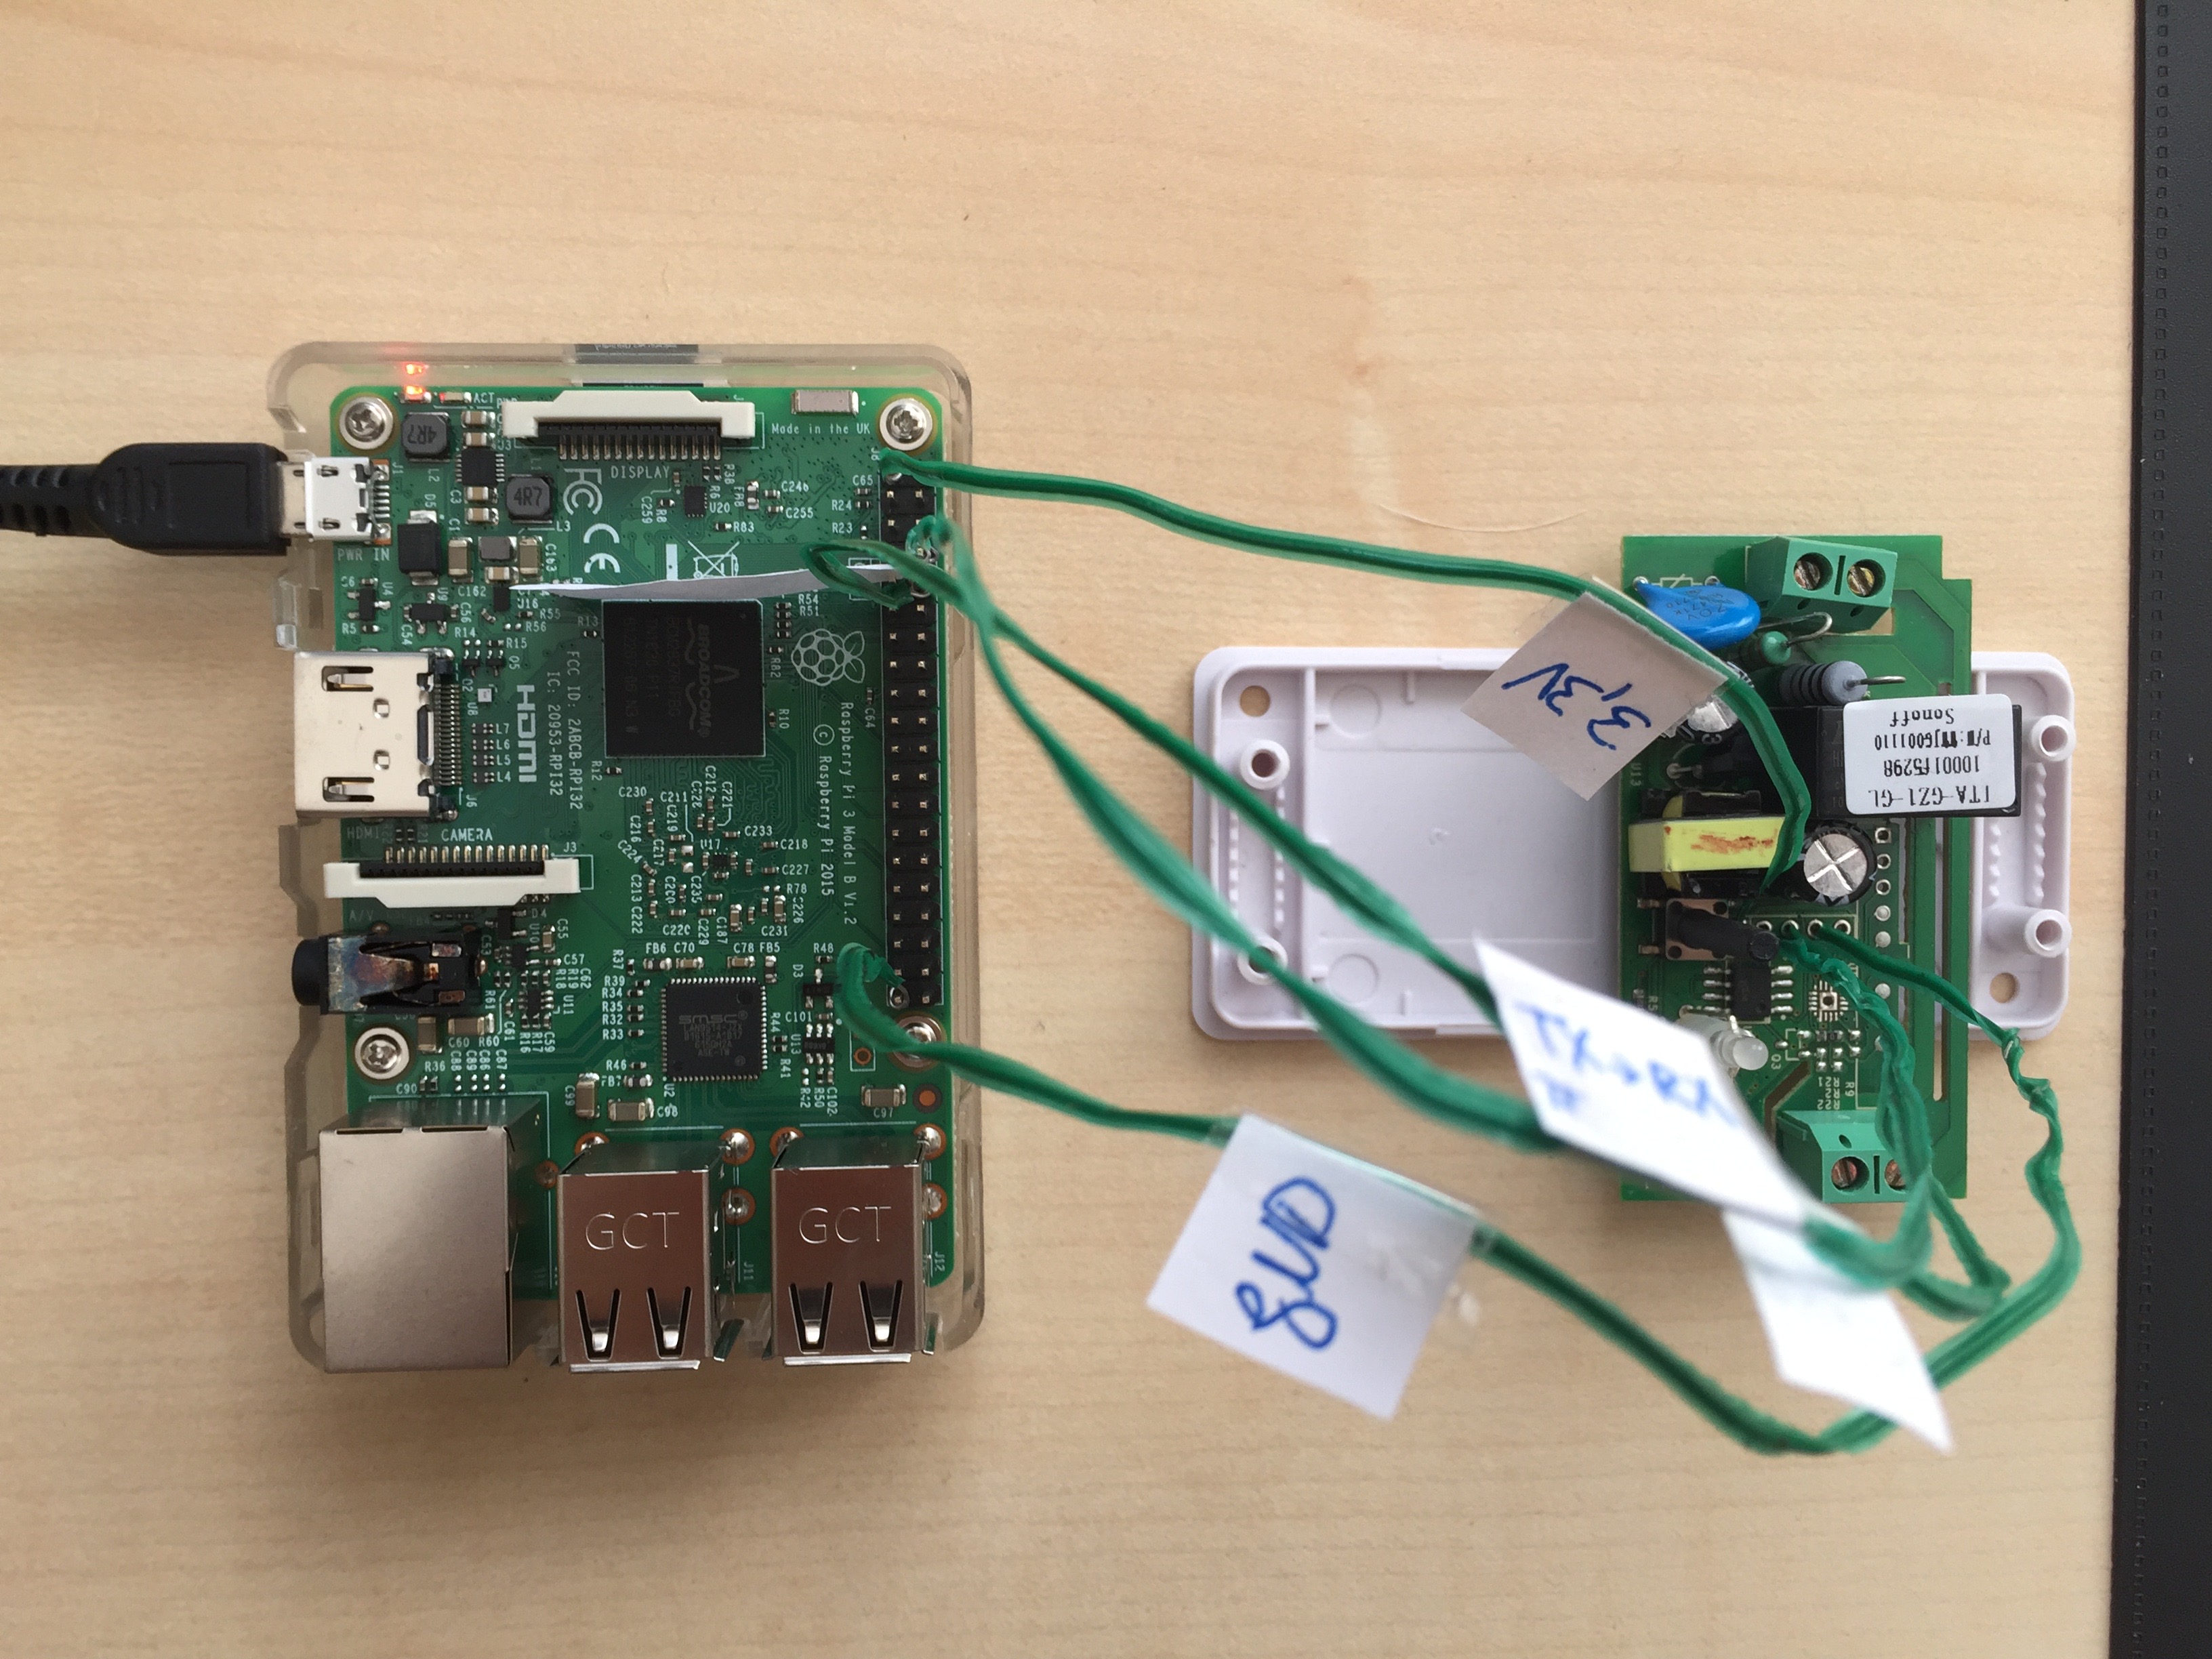
This is how it looks in real-life 😆
Flashing the firmware
-
Erase flash memory: Connect 3.3V while button pressed for about 10 seconds to enter flash-mode. Then release and run:
# if using Raspberry Pi 1/2 use
# esptool.py --port /dev/ttyAMA0 erase_flash

# if using Raspberry Pi 3 use
esptool.py --port /dev/ttyS0 erase_flash
You should see output like this:
➜ ~ esptool.py --port /dev/ttyAMA0 erase_flash esptool.py v2.5.1 Serial port /dev/ttyAMA0 Connecting.... Detecting chip type... ESP8266 Chip is ESP8285 Features: WiFi, Embedded Flash MAC: dc:4f:22:ab:5e:dc Uploading stub... Running stub... Stub running... Erasing flash (this may take a while)... Chip erase completed successfully in 3.3s Hard resetting via RTS pin... ➜ ~ -
Flash .bin, which you can download from the release-section:
Again connect 3.3V while pressing button for 10 seconds. Then release and run:
# if using Raspberry Pi 1/2 use
# esptool.py --port /dev/ttyAMA0 write_flash -fm dout 0x0 /path/to/downloaded/tasmota.bin

# if using Raspberry Pi 3 use
esptool.py --port /dev/ttyS0 write_flash -fm dout 0x0 /path/to/downloaded/tasmota.bin
You should see output like this:
➜ ~ esptool.py --port /dev/ttyAMA0 write_flash -fm dout 0x0 tasmota.bin esptool.py v2.5.1 Serial port /dev/ttyAMA0 Connecting..... Detecting chip type... ESP8266 Chip is ESP8285 Features: WiFi, Embedded Flash MAC: dc:4f:22:ab:5e:dc Uploading stub... Running stub... Stub running... Configuring flash size... Auto-detected Flash size: 1MB Compressed 456000 bytes to 312426... Wrote 456000 bytes (312426 compressed) at 0x00000000 in 29.2 seconds (effective 124.8 kbit/s)... Hash of data verified. Leaving... Hard resetting via RTS pin... ➜ ~ -
Setup Wi-Fi:
-
Connect with an external device to the
sonoff-xxxxWi-Fi AP and configure over the browser. -
Alternative: Reboot your device after flashing (toggle power wire) and connect to the serial console via miniterm:
# if using Raspberry Pi 1/2 use
# miniterm.py /dev/ttyAMA0 115200 -e

# if using Raspberry Pi 3 use
miniterm.py /dev/ttyS0 115200 -e
You will see some output, after pressing enter.
Now just type in, your SSID, press enter and then type the password…
Backlog ssid yourSSID; password yourPassword
-
That’s it 😃
Sources:
Flashing commands
https://spellfoundry.com/2016/05/29/configuring-gpio-serial-port-raspbian-jessie-including-pi-3/