Easily upgrade Tasmota to a newer version or different build while keeping all your settings.
The first rule of upgrading: If it ain't broke, don't fix it!
In other words, ensure that there is a good reason to mess with a working installation (e.g., a need to use a new feature or address a found problem fixed in a more current version).
Any time you upgrade it is highly recommended that you back up your device settings. It is easily done in webUI under "Configuration - Backup Config" page.
OTA upgrade
Upgrading the device firmware over-the-air is the convenient way to upgrade. Open a web browser to you device's web UI and select Firmware Upgrade.
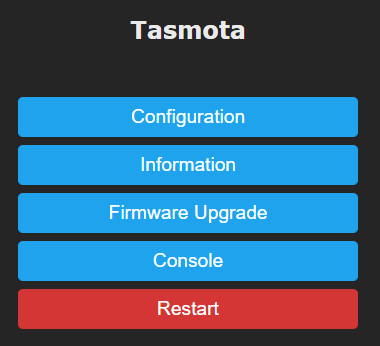
You are presented with two choices. Using an OTA server or by uploading a downloaded or self-compiled binary file.
Upgrade by web server
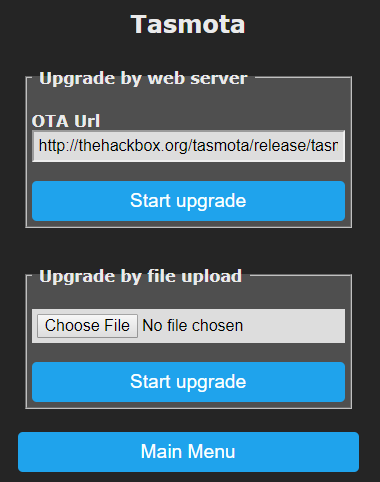
If you want to upgrade to the latest release version click the first Start Upgrade button. This screen should appear

During this process Tasmota will download the new firmware from the url and install it. It might need to download tasmota-minimal.bin first but all that happens automatically. All you have to do is wait 2 to 5 minutes.
After the upgrade is completed you can reconnect back to the web UI and check the firmware version on the bottom of the page.
Changing Ota Url
If you wish to switch to a different build you have to change OtaUrl to the desired binary from our OTA Server.
It is possible to create your own simple http OTA server (https is not supported) using Python and perform upgrades from there.
Install Python and from the folder where the binary resides (make sure tasmota-minimal.bin is located there too) run:
python -m http.server 8000
Change your OtaUrl to http://ipoftheserver:8000/yourbinary.bin and start the upgrade process.
Upgrade by file upload
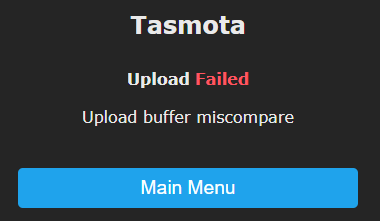
This process requires you to have a minimal build (tasmota-minimal.bin) of the firmware since the upload process needs the space in flash memory to upload the new binary.
When you try to immediately upgrade to a new binary without using minimal firmware you will be greeted with this error.
Browse to the minimal binary with Choose File. The chosen filename should be visible. In our example we use tasmota-minimal.bin

Wait until the device restarts. In the Main Menu web UI will display this warning message on top.
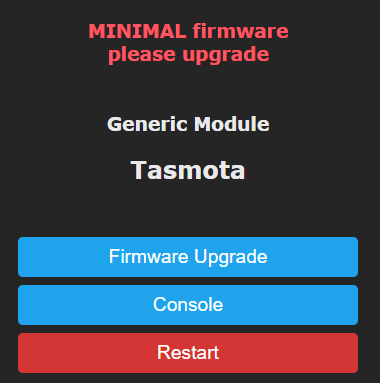
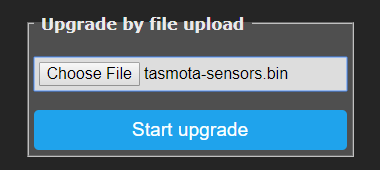
Go to Firmware Upgrade again. This time browse to the binary you want to upgrade to with Choose File and click Start upgrade. In our example we use tasmota-sensors.bin
You will see an Upload starting... and then Upload successful message. Wait until the device restarts, reconnect back to the web UI and check the firmware version on the bottom of the page.
OTA upgrade using commands
Your device can be upgraded using commands via MQTT, web requests or Console in the web UI.
OtaUrl is used to set your OTA address.
otaurl http://thehackbox.org/tasmota/tasmota-sensors.bin
In this example we chose a development branch version with additional sensors support
Initiate upgrade from OTA server
upgrade 1
Wait for the upgrade process to complete and check the Tasmota version. If in console you can use Status 2.
OTA upgrade using on-device button
Devices with a built in button (the one used to put your device into flash mode) can initiate OTA upgrade with it.
7 short presses of the button will start OTA download of firmware using the Ota Url. Device LED is lit during the update.
Serial upgrade
Upgrade over the serial connection using serial-to-USB adapter.
Upload the new version over serial using the same process as in Flashing but DO NOT erase flash. The new binary will flash over the old one and keep all your settings intact.
External programs
Tasmota Device Manager or TDM is a multiplatform GUI application written in Python for discovery and management of Tasmota devices. You can set up OTA url and initiate OTA upgrade from TDM using GUI.
openHAB - implement an automation rule to upgrade devices from openHAB
Node-RED OTA server and firmware manager - Node-RED flow for managing OTA updates
OTA over SCP - setup and configure "OTA over SCP" upload for PlatformIO
Device Settings
Tasmota uses flash memory to store options and settings. New versions add (or remove) features that use various regions of that memory. If you did not erase flash when you flashed your device, an updated version of Tasmota may be accessing areas with values left over from the old Tasmota or even the original factory firmware. This might cause unexpected and unwanted behavior or even major problems (constant reboots or reconnects).
To avoid this use our decode-config tool to easily create and restore backups in Tasmota:
decode-config tool
- decode-config.py - installation instructions in Python for Windows or Linux
- decode-config.exe - Windows only executable. If using this replace
decode-config.pywithdecode-config.exeordecode-config_x64.exein the instruction examples.
1. Make a configuration backup:
-
Create a new backup straight from your device
decode-config.py -d <deviceIP> --backup-file Config-@f --backup-type json@f will be replaced by that device's FriendlyName
-
Convert a previously made
.dmpbackup into a JSON filedecode-config.py -f <dmp_filename> --backup-file Config-@f --backup-type json
2. Perform a reset
Reset 6
Erase flash settings area but retains Wi-Fi and MQTT settings
3. Upgrade the firmware via OTA or file upload
4. Restore configuration
decode-config.py -d <deviceIP> --restore-file <config-filename>
If you can't restore configuration directly you can configure the device manually referring to the Commands article and the settings (e.g., SetOptions, Rules, etc.) in the JSON file you created in step #1. You can paste the JSON to a JSON parser to make it easily readable.
Migration path
Until now several versions of Tasmota have been released starting with the C version Sonoff-MQTT-OTA followed by Sonoff-MQTT-OTA-Arduino, Sonoff-Tasmota and ultimately Tasmota.
Migrating from one version to the next versions is mostly painless as the settings are saved in the same location in flash and newer settings are appended.
As said, mostly painless. There are some deviations to this rule as I rearranged the flash. In the next list you'll find an overview of supported migrations paths.
- No migration from Sonoff-MQTT-OTA to Sonoff-MQTT-OTA-Arduino or Tasmota.
The settings flash layout and OTA image locations are different from the Arduino versions - Easy migration from Sonoff-MQTT-OTA-Arduino 1.0.11 to Tasmota 3.9.x.
After installing Tasmota for the first time some settings need to be adjusted via web configuration or MQTT commands. - Easy migration from Sonoff-MQTT-OTA-Arduino 3.1.0 to Tasmota 4.x.
After installing Tasmota for the first time some settings need to be adjusted via web configuration or MQTT commands. - Easy migration from Tasmota 4.x to Tasmota 5.14.
As a safeguard perform a Backup Configuration before installing the new version. If settings are lost after the upgrade perform a Restore Configuration. - Easy migration from Tasmota 5.2 to Tasmota 6.x.
As a safeguard perform a Backup Configuration before installing the new version. If settings are lost after the upgrade perform a Restore Configuration.- ⚠️ If you've used development versions between 6.6.0.7 and 6.6.0.11 Back up your device settings as described above. Convert the backup to human readable form as you MUST restore these settings manually. ⚠️
- Perform a
Reset 6before upgrading the firmware and, for safe measure, after the upgrade completes. - Enter your device configurations using the settings saved in the first step.
- Easy migration from Tasmota 6.x to Tasmota 7.x. As a safeguard perform a Backup Configuration before installing the new version. If settings are lost after the upgrade perform a Restore Configuration.
If Backup Configuration -> Restore Configuration fails, reset to firmware defaults and use decode-config tool to restore your backed up configuration.
So to migrate from Sonoff-MQTT-OTA-Arduino versions before 3.1.0 to Tasmota 7.x you will need to take five steps:
- Migrate to Tasmota 3.9.x
- Migrate to Tasmota 4.x
- Migrate to Tasmota 5.14
- Migrate to Tasmota 6.x
- Migrate to Tasmota 7.x