There are several Tuya dimmer and switch variants made by various manufacturers. The switches range from 1 to 8 gangs. The dimmers are usually 1 gang. They dim mains voltage for various lighting types: incandescent, CFL, and LED. Consult the specific device for the type of bulbs and capacity it supports as well as the bulbs themselves to verify they support dimming.
Identification and Technical details
The basic identification of a Tuya device is when the device information references the "Tuya Smart", "SmartLife", or "Smart Living" app. These switches and dimmers are based on a Tuya TYWE3S Wi-Fi PCB module along with an MCU. TYWE3S is based on the ESP8266 which is supported by Tasmota.
The TYWE3S module mostly takes care of Wi-Fi and software features while the MCU controls the actual hardware (buttons, relays, dimmer, power measurement, etc). The MCU is interfaced to TYWE3S using the serial interface which connects to the Rx and Tx pins.
The easiest way to identify if your switch or dimmer uses MCU is by using a continuity tester (multimeter, ohmmeter) and checking continuity from the Rx and Tx pins on TYWE3S to any other chip. Then check the datasheet of that chip to see if it is an MCU.
Flashing - Preparation
To boot the TYWE3S in flashing mode, GPIO0 needs to be connected to GND while powering up. It can be left grounded for the entire process. Flashing a TYWE3S connected to a MCU is a bit trickier than one without MCU. This is due the same Rx Tx pins used by MCU and serial programmer for flashing. The TYWE3S cannot be booted to flash mode with MCU sending data over the same pins. To be able to do that, we need to disable MCU from sending data over Rx and Tx pins. There are few ways to do it:
- Disconnect TYWE3S module from the rest of board. (Naah, too much work)
- Just break the Rx track from MCU to TYWE3S, flash and then reconnect. (Messy work, we want cleaner approach)
- Just keep MCU disabled while flashing TYWE3S without any soldering / cutting. (We like that)
The easiest is to keep MCU disabled is by identifying the NRST/RST (Reset) pin of the MCU from its datasheet and connect it to GND for the entire flashing process. This will keep MCU disabled while you flash TYWE3S. If there are some contacts or test points in switches that connect to the MCU, you might be lucky to find contacts for RST that you can easily solder onto.
TYWE3S Connection Options
- 3D print a flashing Jig and use pogo pins to make nice and easy to use flashing jig
- Solder wires directly onto TYWE3S
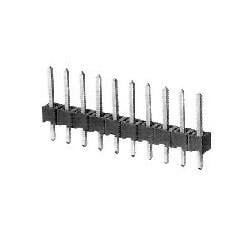
- Use a jumper header like the one below and bend the pins to match VCC, Rx Tx GPIO0 and GND. You can just press the jumper header to the contacts during the flashing process
Flashing - Process
Once you are done identifying the pins and ready to connect, BEFORE connecting USB to PC you need to connect them as follows:
NOTE : Use 3.3V NOT 5V
| TYWE3S | Serial Programmer |
|---|---|
| RX | TX |
| TX | RX |
| GPIO0 | GND |
| GND | GND |
| VCC | 3.3V |
If an MCU is present, bridge RST to GND on the MCU
Use a 6.6.0.10 Tasmota version or higher. There are lots of Tuya Serial fixes / features added in there and the tutorial below expects them.
Now you need to follow the commands explained in the flashing tutorial.
TIP: If you are using jumper headers use sleep 15 && before your commands, this would free your hand and give you some time to set the jumper pins and connect the USB to PC.
Configuration
-
Once Tasmota is flashed on the TYWE3S, just disconnect GND -> GPIO0 (and RST if there is an MCU), and power your device again from USB.
-
On your PC, you should see a Wi-Fi network named
sonoff-xxxxwherexxxxis a number from the ESP's MAC address. -
Connect to it and go to 192.168.4.1 in your browser. Enter the Wi-Fi credentials for your network and click save.
-
Connect your PC back to your network. Now you need to find the IP of newly connected Tasmota device. Refer to this very good video from SuperHouseTV (ignore flashing information) about configuring Tasmota.
-
Once you get to the Tasmota configuration you need to select
TuyaMCUmodule assign GPIO components as indicated below depending on your hardware. You already know the pin connections to the MCU.GPIO Component 01 Tuya Rx (108) 03 Tuya Tx (107) 13 Tuya Rx (108) 15 Tuya Tx (107) -
If the device is connecting fine to your network, now is the time to power it down and re-assemble it. Connect a test bulb (or to the final place if you don't mind testing there)
-
Once this is saved and device is rebooted. Open the Tasmota configuration page and you should be able to use the Toggle button to toggle the dimmer or at least one of the gangs in a multi gang switch.
-
Follow the process here depending on switch or dimmer.
Product Specific guides
Otim Dimmer
Zemismart Curtain Motor
DM_WF_MDV4 Leading edge dimmer
Product Links:
Wiki has moved to link on the left.
